
Autocrat is a multi-purpose document merge tool works with Google Drive. It allows you to take data from a spreadsheet and merge it into a document via a template. Tell Autocrat which fields to merge via <<merge tags>> and then let Autocrat mass-generate personalized documents. Users can also send the documents as email attachments. Autocrat is useful to generate certificates when conducting, seminar, webinar, competitions, quiz etc. It's possible to reuse the template for further use.
Here I am going to discuss how to create and send event certificates in large numbers using Google Drive and Autocrat.
Here I am going to discuss how to create and send event certificates in large numbers using Google Drive and Autocrat.
Prepare a certificate template
First, create a folder for the certificate making purpose inside Google Drive. All files regarding the certificate save here.

Prepare a certificate from Google Slide available at Google Drive. Select a good template from there. Here First Name and Last Name put inside <<merge tags>>. Here values will load from the user's details from a spreadsheet.
Prepare a spreadsheet
Create a Spreadsheet from Google Drive.
Give column names. The columns names in the spreadsheet and merge tags names in the certificate template should be the same.
 |
| Add the participant's details into the spreadsheet. |
Install Autocrat
From the same Google Drive Spreadsheet, Add-ons > Get add-ons.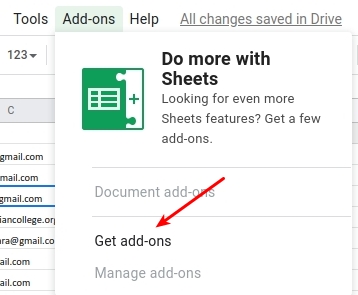
Find Auto crat app. Click on the icon.

Install the Autocrat app

Autocrat app will appear on the Add-ons menu.

Open the autocrat and follow the steps configure the job to send certificates.

 |
| Give a name for the new job. |
 |
| Select the Google Drive Presentation slide created for the certificate template. |
 |
| Find the certificate template. |
 |
| See the selected certificate template. Click on Next button. |

2. & 3. <<Variable Name>> should match with the column in the spreadsheet.
4. Click on Next button.

Webinar-certificate-<<First Name>>-<<Last Name>>-<<Email>>
2. Select PDF format. The certificate should be in PDF Format.
3. Click on Next button to continue.
 |
| Choose the folder where certificates to save. Choose the same folder created for this purpose. |


 |
| If you plan to send the certificate by email, choose Yes. Need only PDF certificate, choose No. |

1. To give the email syntax here. <<Email>> It should same as in the spreadsheet to send mails to participants emails.
2. The subject of the letter.
3. Body of the letter. Use <<First Name>> <<Last Name>> to appear participants name in each letter.
4. Save the file.

2. Edit the process.
3. Preview email message and certificate.
4. Delete the process.
 |
| Certificates sending in progress. |
Remember to add a small number of user details in the spreadsheet. If the number of entries more, Google denies sending emails. Limit the number to 50 at a time. After one batch sending the certificates, clean the spreadsheet (Don't remove column names). Add the next batch of participants details.


The certificates in PDF format store into the folder in Google Drive. The certificate can be share to the participant using Gmail. They can download. The certificates can be print from PDF file.
No comments:
Post a Comment